
This article explains how to synchronize your bol.com seller account with Boloo. Once the synchronization is complete, you will have valuable insights. You will also be able to use Boloo's email campaign feature.
Follow these steps and your store will be synchronized in no time. All you need is an active seller account.
Step 1: Go to https://login.bol.com/login
Step 2: Click on your seller name in the top right corner and then on Settings.
Step 3: Once in Settings, click on API Settings under Services.
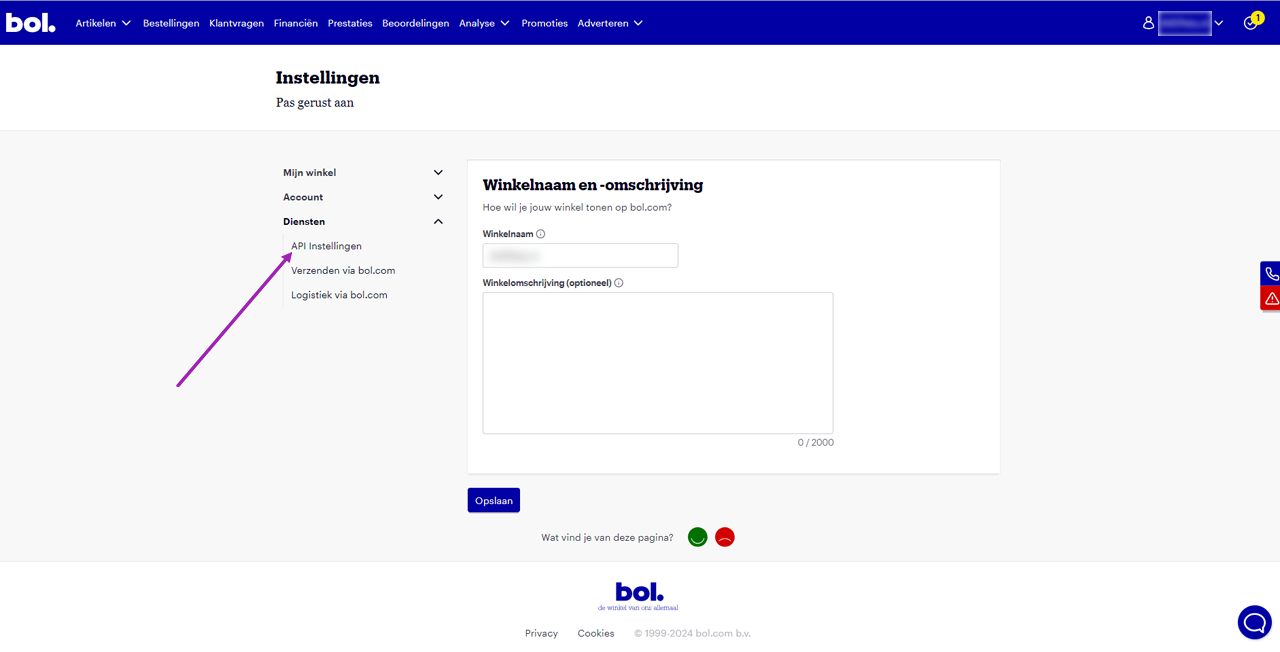
Step 4: In the 'Technical contact' field, enter your own details.
Step 5: Under 'Client credentials for the Retailer API', click the '+create' button.
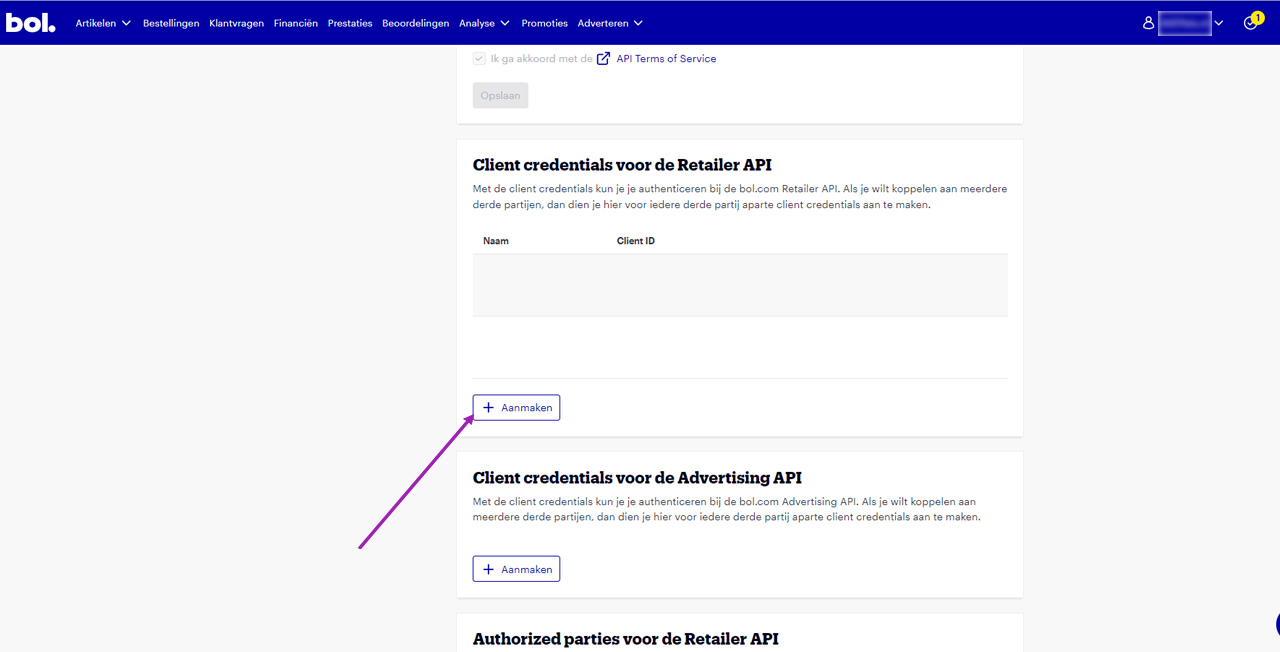
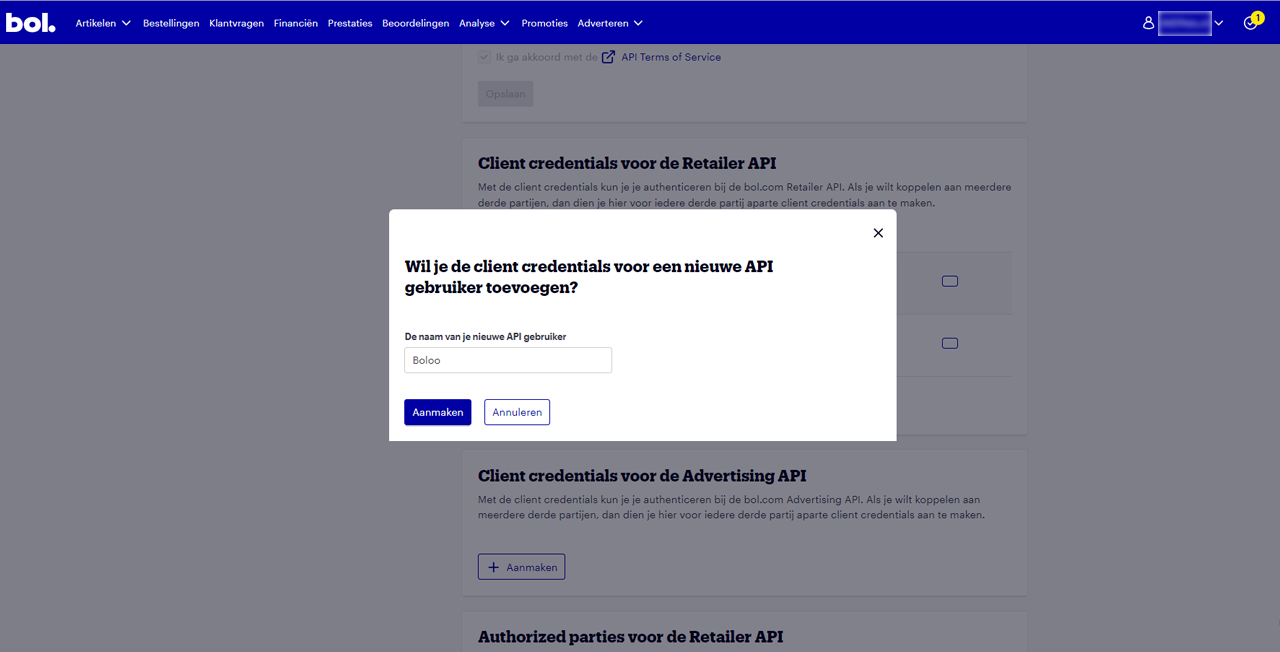
Step 4: After clicking 'Create', you will see the screen shown below. As the username, enter Boloo as shown in the image. Then click: Create. Once you've done this, your API keys will appear.
Step 5: The API keys have now been created. The code shown at the top is the Client ID. Below it you'll see 'show secret'. This is your Client Secret. Now go to https://app.boloo.co/ and navigate to Store Settings.
Step 6: Enter the code in the Client ID field. This is the code you obtained from your bol.com seller account. Copy it carefully and paste it into the field. Below that, enter the Client Secret. Copy this from your bol.com seller account as well by clicking 'show secret', then copy and paste the code you receive. After that, enter your store name in Boloo and optionally an address.
Step 7: The synchronization will now start. It is important that you do not change your API keys, as the synchronization will not complete if you do. It may take a while for your entire store to be connected.
You should be able to figure it out this way. If you have any questions, you can always reach us via the chat function.
Below is a video to give you a visual overview of the explanation. Please note: the video shows the older version of the bol.com seller account. The images above show the latest version.
Watch the video for instructions: